You are using an out of date browser. It may not display this or other websites correctly.
You should upgrade or use an alternative browser.
You should upgrade or use an alternative browser.
Homemade metal detector
- Thread starter HunterHarvey
- Start date


Help Support Prospecting Australia:
This site may earn a commission from merchant affiliate
links, including eBay, Amazon, and others.
You can actually make these coil housings yourself. Here's how:
1. You build yourself a vacuum forming rig, just a square frame built out of a few bits of timber and a bit of peg board on top (has small holes in it to hold tools), attach a hose nozzle to fit a vacuum cleaner to it;
2. Create a plaster / wooden mould for the coil housing. If you have a commercial coil you can copy that pattern. Place it in compacted sand/soil, then pour plaster into impression left by the coil;
3. Get ABS plastic sheeting;
4. Place the mould on top of the vacuum forming rig;
5. Put it in the oven, some people use heater elements and make it part of the rig;
6. While its still hot and pliable place the ABS plastic over the top of the mould so it covers the mould and the holes in the peg board to about an inch on the outside of the mould;
7. Turn on the vacuum cleaner;
8. In a few seconds you have a fully formed coil housing, now cut the excess material off and sand the coil with some light grit sandpaper;
9. Cut a hole in the top of the coil housing for the wire loom to go through, make a small chimney in your mould for this purpose;
10. Wrap the wires as I showed in previous post. Place the wires in the new coil housing;
11. Solder on a coil connector to the end of the wire loom and test the coil is working;
12. When you are happy it is all working, fill the bottom of the coil housing with resin. Ensure that it also fills the small chimney for the coil loom. This makes it water proof and scratch resistant.
13. Go try out your new coil.
Once you have your vacuum forming rig built you can then build as many coil housings as you need and experiment with the different types of coil Mono, Double D, Concentric, etc.
Hope this helps.
Moneybox
Philip & Sandra Box
I love what you guys are doing. There's nothing more rewarding than building your own and seeing it work in the end. I've never built a detector but if I had the time I'd certainly give it a go. I have the ability to form all the plastic parts in whatever shape is required however just about every form requires a mould or plug to be formed first. then you may as well produce them in some quantity as the mould would usually be reusable over and over again. With a little handy work a coil housing or control box could be formed in a unique and functional shape at a relatively low cost.
The biggest problem for me would be making the detector function properly. Obviously the plans you buy are for circuitry that will work but it must be quite basic. Do they offer enough information for you to understand how it works? If you understand what makes it function then it can be improved upon to make it a decent machine. I can handle electrics but I'm not knowledgeable in the function of the electronic components.
I would enjoy the challenge of building a ready made plan and then upgrading it as required.
Moneybox
Philip & Sandra Box
gcause said:You can actually make these coil housings yourself. Here's how:
1. You build yourself a vacuum forming rig, just a square frame built out of a few bits of timber and a bit of peg board on top (has small holes in it to hold tools), attach a hose nozzle to fit a vacuum cleaner to it;
2. Create a plaster / wooden mould for the coil housing. If you have a commercial coil you can copy that pattern. Place it in compacted sand/soil, then pour plaster into impression left by the coil;
3. Get ABS plastic sheeting;
4. Place the mould on top of the vacuum forming rig;
5. Put it in the oven, some people use heater elements and make it part of the rig;
6. While its still hot and pliable place the ABS plastic over the top of the mould so it covers the mould and the holes in the peg board to about an inch on the outside of the mould;
7. Turn on the vacuum cleaner;
8. In a few seconds you have a fully formed coil housing, now cut the excess material off and sand the coil with some light grit sandpaper;
9. Cut a hole in the top of the coil housing for the wire loom to go through, make a small chimney in your mould for this purpose;
10. Wrap the wires as I showed in previous post. Place the wires in the new coil housing;
11. Solder on a coil connector to the end of the wire loom and test the coil is working;
12. When you are happy it is all working, fill the bottom of the coil housing with resin. Ensure that it also fills the small chimney for the coil loom. This makes it water proof and scratch resistant.
13. Go try out your new coil.
Once you have your vacuum forming rig built you can then build as many coil housings as you need and experiment with the different types of coil Mono, Double D, Concentric, etc.
Hope this helps.
Great post gcause.
I'd just like to add that a similar but opposite mold can be used for blow moulding (using air pressure rater than vacuum) with the added benefit of being able to have a mould that comes apart. More complex shapes can be removed from the mould. Many more options are available for low volume plastic forming. Perhaps the first challenge is to create a detector worthy of the effort you are going to put into the plastic parts.
- Joined
- Dec 1, 2014
- Messages
- 243
- Reaction score
- 41
Anyone built a trommel and if so what things are needed type of motor or a small wash plant any ideas.
Hi Lucky,
Rather than hijack this thread I have created another one with a Hand Trommel that is easily constructed.
See here:
https://www.prospectingaustralia.com/forum/viewtopic.php?pid=134891#p134891
Cheers,
Grant
Rather than hijack this thread I have created another one with a Hand Trommel that is easily constructed.
See here:
https://www.prospectingaustralia.com/forum/viewtopic.php?pid=134891#p134891
Cheers,
Grant
kleinman98
John Kleinman
- Joined
- Oct 3, 2013
- Messages
- 886
- Reaction score
- 233
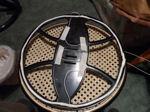
I ordered a couple of coil housings on Ebay and one has a cuff as well. Just buy some fibreglass potting resin (check) to seal the coil after build and adjustments. Remember full dish coils will be heavy so plan to keep the weight down.
Ben78
Ben
- Joined
- Feb 18, 2013
- Messages
- 912
- Reaction score
- 278
Moneybox said:The biggest problem for me would be making the detector function properly. Obviously the plans you buy are for circuitry that will work but it must be quite basic. Do they offer enough information for you to understand how it works? If you understand what makes it function then it can be improved upon to make it a decent machine. I can handle electrics but I'm not knowledgeable in the function of the electronic components.
I would enjoy the challenge of building a ready made plan and then upgrading it as required.
Moneybox, the Surf PI 1.2 is actually the old Whites Surfmaster designed by Carl Moreland. He put the circuit into the public domain via his Geotech website with the aim to have the 'community' work together to produce new designs and better functioning detectors. The result directly was the silverdog kits - which were very professionally designed through the geotech forum. Anyone can produce a circuitboard off the schematic but it may not be a great board due to capacitance in the layout on PCB amongst other things. This is part of the reason the Silverdog kit is so popular. The community also went on and designed the Barracuda and Hammerhead detectors. The later version Hammerhead was Surface mount components.
The circuits aren't basic as a means to be easily made they are basic because a non ground balancing PI is a basic affair, essentially Pulse, turn off pulse, wait a little bit, see if the pulse is bigger than expected, do it again.
If you read the Hammerhead doc it explains how that circuit works and what all the components do - www.geotech1.com/pages/metdet/projects/hammerhead/HHv1p5.pdf
kleinman98
John Kleinman
- Joined
- Oct 3, 2013
- Messages
- 886
- Reaction score
- 233
I ordered all the hardware as well and as I am building it for the surf it has to be waterproof. Ordered IP68 rated plugs and sockets and HexSeals for the pots. Will use a straight upper tube with welded handle in T6 alloy and coil casings from ebay. Also ordered lock buttons for the slides. Just need a waterproof enclosure for the electronics.
Bottom tube and T is from Bunnings and depending on flex may have to put a fibreglass rod inside to stiffen. Fibreglass potting resin will be used for the coil.
Bottom tube and T is from Bunnings and depending on flex may have to put a fibreglass rod inside to stiffen. Fibreglass potting resin will be used for the coil.
Ben78
Ben
- Joined
- Feb 18, 2013
- Messages
- 912
- Reaction score
- 278
T6 is just a heat treatment demarcation. The best bet for a detector used in water would be full plastic (glass/frp/carbon) or anodised aluminium. 'Marine' grade aluminium is 5083 and gets a decent oxide layer on it which protects it from the marine environment but isn't particularly attractive. The oxide is what makes aluminium boats turn white/grey over time.
For a waterproof enclosure try a piece of PVC pipe, or a Kinchrome/Pelican Case. I am using a lunch box with 'air tight' silicone seal but I am also not chasing waterproofness as my coil is not technically submersible.
For a waterproof enclosure try a piece of PVC pipe, or a Kinchrome/Pelican Case. I am using a lunch box with 'air tight' silicone seal but I am also not chasing waterproofness as my coil is not technically submersible.
- Joined
- Dec 1, 2014
- Messages
- 243
- Reaction score
- 41
Can anyone on this forum build a replica gpz 7000 for a $1,000 and sell it for 1,000 I would interested if someone had the know how. And trust if anyone could build one similar 20 orders straight away from forum members. Cheers would love to hear back and would it be hard to make.
- Joined
- Sep 11, 2014
- Messages
- 1,484
- Reaction score
- 3,554
I can make it, send the 20 order deposits through and I'll get the kids to start building from logo complete with stickers and all.lucky streak said:Can anyone on this forum build a replica gpz 7000 for a $1,000 and sell it for 1,000 I would interested if someone had the know how. And trust if anyone could build one similar 20 orders straight away from forum members. Cheers would love to hear back and would it be hard to make.
Full payment must clear before I'll post, let me know mate :/
Now, back to the proper thread.
ProspectorPete said:I can make it, send the 20 order deposits through and I'll get the kids to start building from logo complete with stickers and all.lucky streak said:Can anyone on this forum build a replica gpz 7000 for a $1,000 and sell it for 1,000 I would interested if someone had the know how. And trust if anyone could build one similar 20 orders straight away from forum members. Cheers would love to hear back and would it be hard to make.
Full payment must clear before I'll post, let me know mate :/
Now, back to the proper thread.
Build it for $1000, sell it for $1000. We'll be rich.
- Joined
- Oct 24, 2013
- Messages
- 215
- Reaction score
- 104
Ramjet said:ProspectorPete said:I can make it, send the 20 order deposits through and I'll get the kids to start building from logo complete with stickers and all.lucky streak said:Can anyone on this forum build a replica gpz 7000 for a $1,000 and sell it for 1,000 I would interested if someone had the know how. And trust if anyone could build one similar 20 orders straight away from forum members. Cheers would love to hear back and would it be hard to make.
Full payment must clear before I'll post, let me know mate :/
Now, back to the proper thread.
Build it for $1000, sell it for $1000. We'll be rich.
Bahahahaha :lol:
Sorry to go OT for a sec. Reminds me of an old joke.
Mick and Paddy decide to get into the fruit business. They buy an old truck, load it up with watermelon and sell them door to door.
Mick says, "We're buying them for a dollar and selling them for a dollar. Not making any money."
Paddy says "We need a bigger fooken truck!"
Mick and Paddy decide to get into the fruit business. They buy an old truck, load it up with watermelon and sell them door to door.
Mick says, "We're buying them for a dollar and selling them for a dollar. Not making any money."
Paddy says "We need a bigger fooken truck!"
Hee-haw good one . Oh did you hear that the voice of Roger Ramjet cartoons died-his name was Gary Owens.
- Joined
- Oct 2, 2014
- Messages
- 173
- Reaction score
- 93
lucky streak said:Can anyone on this forum build a replica gpz 7000 for a $1,000 and sell it for 1,000 I would interested if someone had the know how. And trust if anyone could build one similar 20 orders straight away from forum members. Cheers would love to hear back and would it be hard to make.
even if they could it would be against the law due to patent infringements
however i think someone could and will eventually build something as good for whole lot less
Jaros said:Hee-haw good one . Oh did you hear that the voice of Roger Ramjet cartoons died-his name was Gary Owens.
Didn't know he died 8.( Having the initials RR I have always been called Ramjet.... among other things.
He has a write up in todays Courier Mail obituary section.
Moneybox
Philip & Sandra Box
Ben78 said:Moneybox said:The biggest problem for me would be making the detector function properly. Obviously the plans you buy are for circuitry that will work but it must be quite basic. Do they offer enough information for you to understand how it works? If you understand what makes it function then it can be improved upon to make it a decent machine. I can handle electrics but I'm not knowledgeable in the function of the electronic components.
I would enjoy the challenge of building a ready made plan and then upgrading it as required.
Moneybox, the Surf PI 1.2 is actually the old Whites Surfmaster designed by Carl Moreland. He put the circuit into the public domain via his Geotech website with the aim to have the 'community' work together to produce new designs and better functioning detectors. The result directly was the silverdog kits - which were very professionally designed through the geotech forum. Anyone can produce a circuitboard off the schematic but it may not be a great board due to capacitance in the layout on PCB amongst other things. This is part of the reason the Silverdog kit is so popular. The community also went on and designed the Barracuda and Hammerhead detectors. The later version Hammerhead was Surface mount components.
The circuits aren't basic as a means to be easily made they are basic because a non ground balancing PI is a basic affair, essentially Pulse, turn off pulse, wait a little bit, see if the pulse is bigger than expected, do it again.
If you read the Hammerhead doc it explains how that circuit works and what all the components do - www.geotech1.com/pages/metdet/projects/hammerhead/HHv1p5.pdf
Thanks Ben78. I'll enjoy learning from this when I get the time. Right now I'm preparing the vehicle while Sandra's attending to food, clothing, bedding etc for 5 months on the road. We planned to leave on Saturday 28th but we still have a couple of tyres sitting on the water. Perhaps they've arrived in Fremantle port but the shipper is not answering the phone. I doubt we'll get away on Saturday.
Similar threads
- Replies
- 4
- Views
- 696
- Replies
- 8
- Views
- 3K
- Replies
- 2
- Views
- 745