Hi All
I thought I would show you the progression of the "Furnace" build that I am working on ATM.
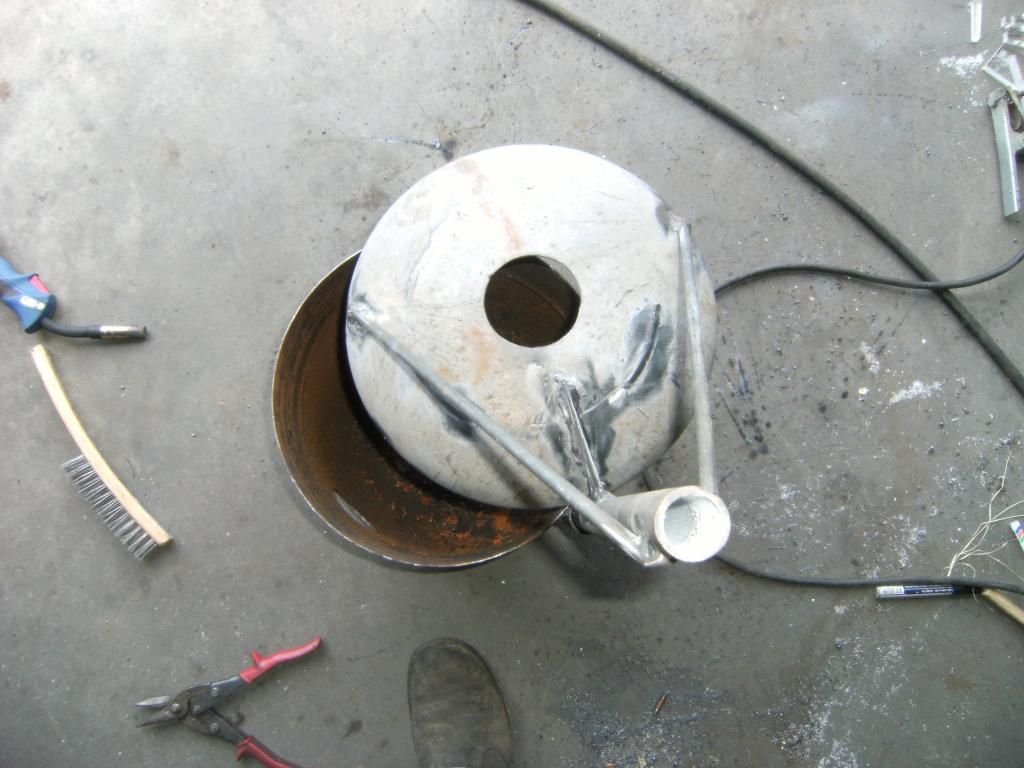
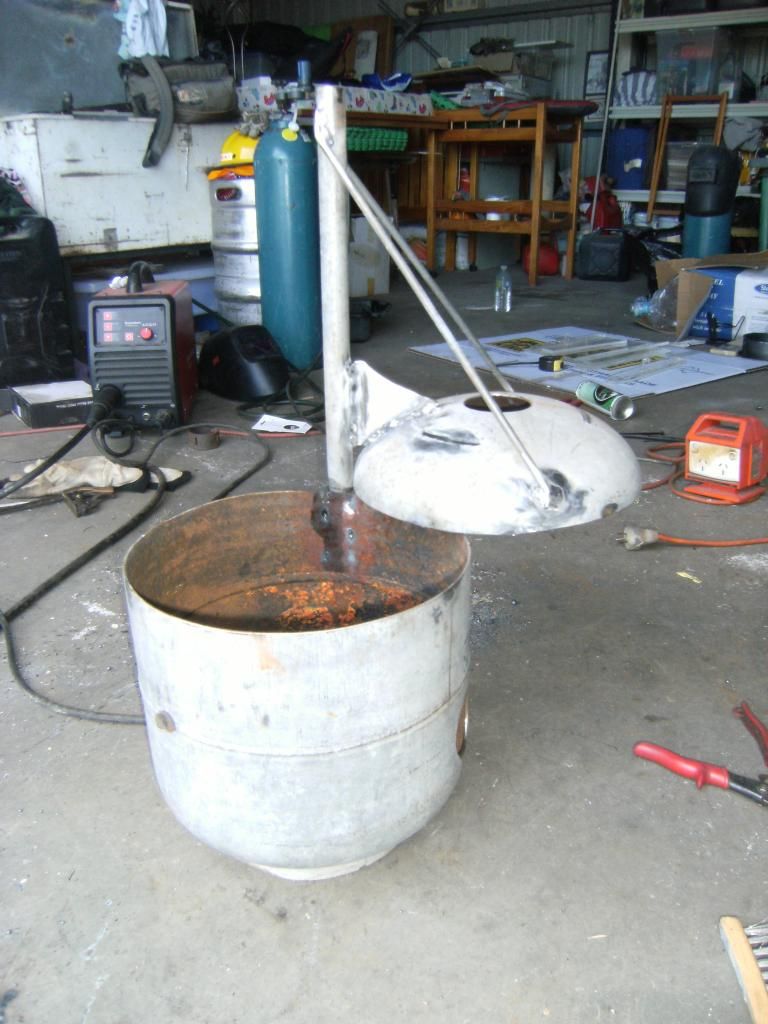
I am using a 9kg gas cylinder for the vessel, so all there was to do to this point is to, remove the valve, cut off the top ring/ shroud, cut the top section for the lid, cut out 2 holes one in the lid & one in the side down low, then I needed to make up the pivot point & lid support.
That is about as far as it goes for now.
I need to order the refractory cement & make up the mould to pour the internal of the furnace, here are some pics, I will post the next stage when I have the stuff, I will put up the plans for this when I have finished that way I can add any helpful comments to help any one who wants to build one.
cheers
Lee
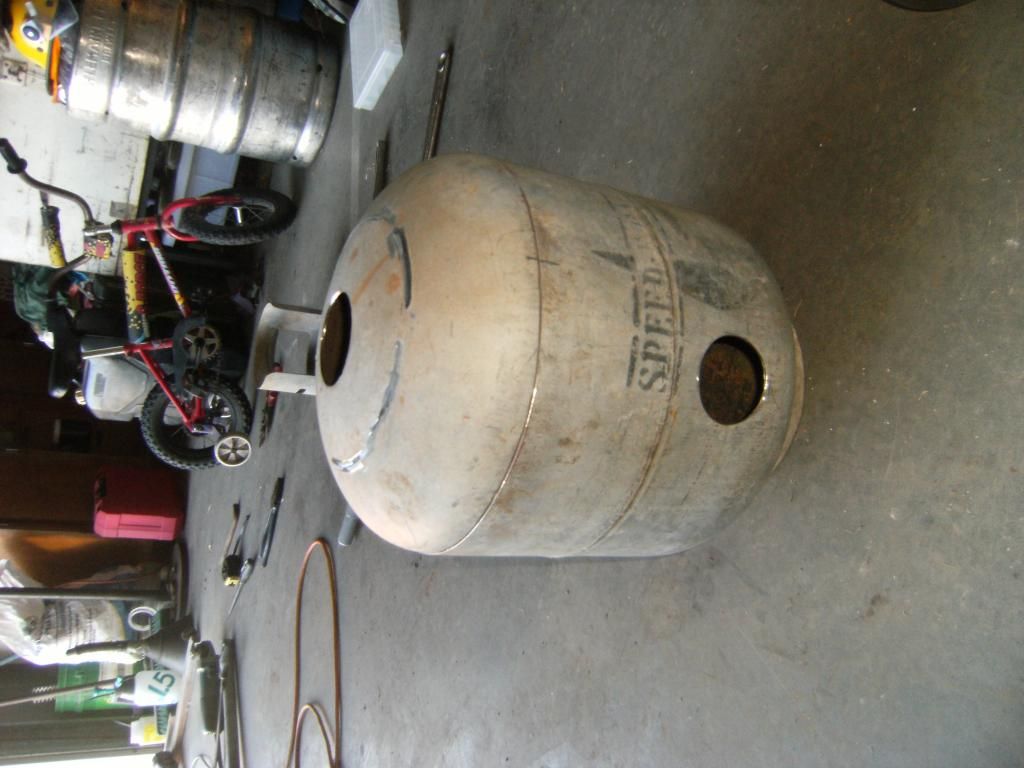
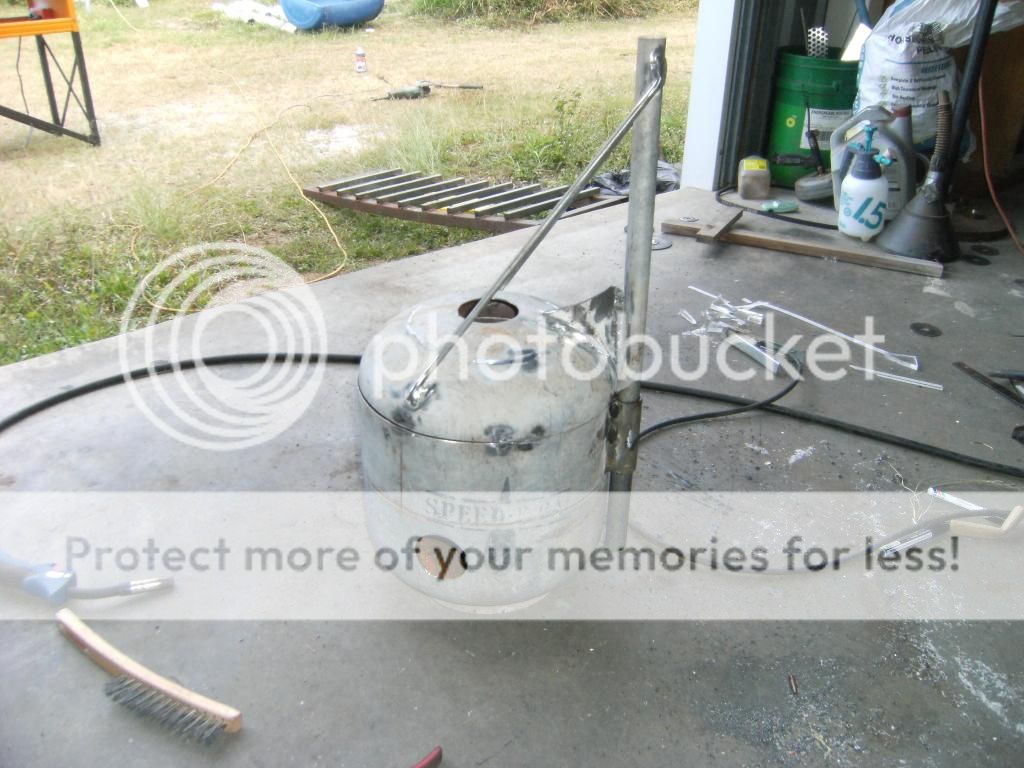
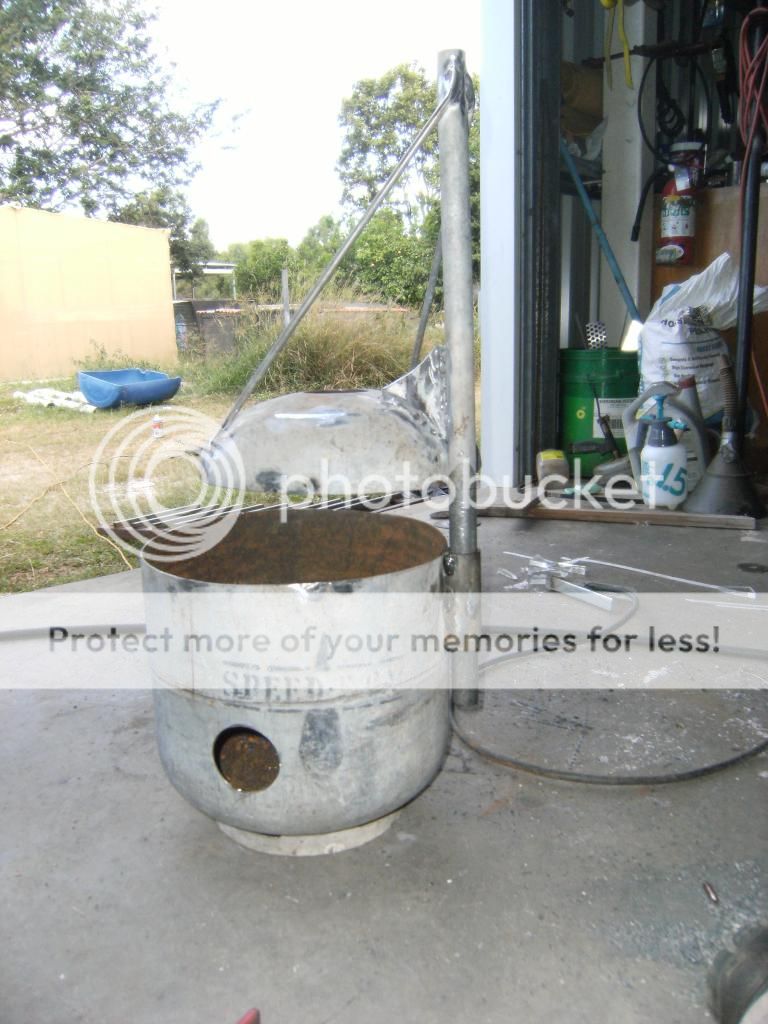
I thought I would show you the progression of the "Furnace" build that I am working on ATM.
I am using a 9kg gas cylinder for the vessel, so all there was to do to this point is to, remove the valve, cut off the top ring/ shroud, cut the top section for the lid, cut out 2 holes one in the lid & one in the side down low, then I needed to make up the pivot point & lid support.
That is about as far as it goes for now.
I need to order the refractory cement & make up the mould to pour the internal of the furnace, here are some pics, I will post the next stage when I have the stuff, I will put up the plans for this when I have finished that way I can add any helpful comments to help any one who wants to build one.


cheers
Lee