Bellows puffer style drywasher plans

Prospecting Australia

Help Support Prospecting Australia:

This site may earn a commission from merchant affiliate links, including eBay, Amazon, and others.
that is a nice dream... thanks for sharing that vid

The Keen dry blowers have a material similar to parachute material as the cloth which is glued to the bottom of the riffles so nothing can get underneath them. Air flow is good but the weave is tight enough not to allow much to get through. You can buy the same fabric from prospecting stores online.

There is also a bit of tape put under the riffles to create a dead air area slightly in front to further help prevent fine gold from getting blown out of the riffle tray.

Cheers,
Matt
 
I can vouch for the tape concept. Areas Ive dug like smythesdale has lots of fine flat flaky gold and by adding the tape under the top side of the riffle underneath makes all the difference. That sounds really confusing :)
 
That ballad video is an excellent demo just a set of dimensions and GTG. Cheers for the share.
 
Went out to Bunnings today and got some supplies for it. Just going to use pine for it until i get the concept right. I bought 8 x 1mtr lengths. I have decided to go with a thick canvas or leather hopper instead of the tin one as I want it to fold up like one of those old style deck chairs for storage and easy setup. Couldn't get expanded mesh instead I got a section of 1x1 inch hole grille they had in the garden section its strong though so should work well. I couldn't get a slick plate so I bought ant capping instead it should work. I also found a metal funnel to feed the material from the cloth bag hopper to the slick plate inside. I will put a sheet of metal inside this to regulate the flow of material to the sluice. Also found some self adhesive foam material to create an air tight fit around the base of the riffle box and the top of the bellows.
Will see how I go for timber on this might have to go back for more. I have the design in my head now I just have to go build it. :)
 
Got about 70kg of classified dirt to run through a dry washer now, so I better get into gear and spend my upcoming long weekend with the tools out lol

Digga, so the tap of blanking plates, do they go on the below side of the riffles, or the up side?

1400929701_untitled.jpg
 
Yep, his latest totals an ounce.
In that first clip they put 368 buckets through the dryblower in 4 days to get that haul. That's about 9 cubic meters.
 
Yep,
I was thinking the same thing.
It can take me all day to get what he blew out of the top riffle.
But you can see how the riffles and mesh work now.
 
Ok so here is my basic frame design for the drywasher :)

1400982260_image.jpg


I want it to be made out of canvas and wood as much as possible, so the only metal on the unit would be around the top frame of the hopper to protect the wood, the classifier screen itself, the hopper regulator, the main pulley with handle and the slick plate inside.

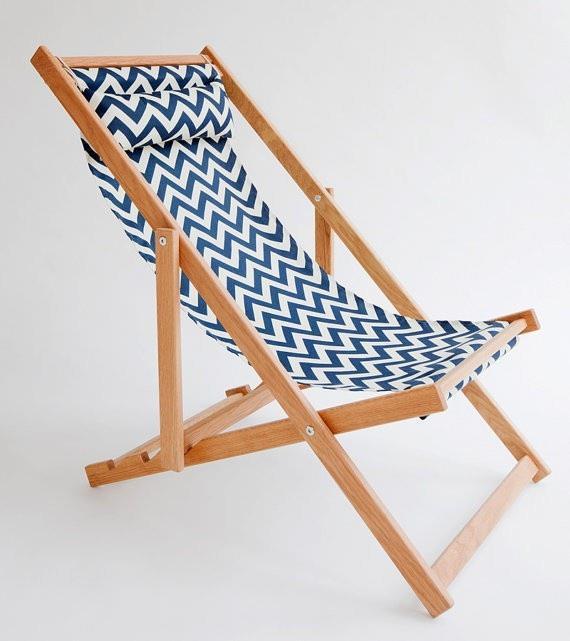
I want it to fold up completely like this chair does for easy transport and setup. The idea being you just unfold it and it all swings into place ready to start processing dirt.

I would just take the canvas off and have the base chair frame as a starting point.

I would reuse the canvas for the hopper and the bellows.

If you've ever used one of these deck chairs the frame itself is very sturdy and hard to knock over because of the wide base. You just have to make sure they cut the notches deep enough or it will jump out of the notch and fold flat on you.

I'm thinking I can attach the feeder to the top with some support arms to hold it in place and the sluice itself can rest on top of the bottom rails. The support arms for the hooper would be made like the main support a U shape and would fold up from the front of the chair where the bolt is in the base. i.e. the base has the notches in it. Think main support just reversed and pointing up at the front as the hopper holder.

I would add an extra support rail across the middle of the main support i.e. the one that sits in the notches on the base. The extra support rail would hold the base of the sluice box with the top attached to front of the chair frame. I can add extra notches into the base board to get the angle of the sluice just right.

The bellows would sit directly under the sluice box and it is already designed to fold up but it would probably sit down a bit. I anticipate that this would be the tallest piece on it when it is folded flat i.e. the sluice box and bellows combined would be the total height of the unit when folded flat on the ground.

The electric motor would be attached to the right front of the base of the chair to drive the bellows.

I want to make the hopper big enough to take a 20lt bucket of material in one go with the flow to the sluice regulated by a feeder which would initially drop into a slick plate before hitting the first riffle of the sluice.

What do you fellows think?
 
Seems legit. Not sure of the wood holding up over the longer term, alot of these things are built to look nice but not to last. Securing some mechanism to clamp over the grooves would be advised. Certainly an excellent prototype to get going in the direction you're intending, easier to adapt than scratch build at times, often go down that path before refinement on my gold projects, often its hard to see the design faults until testing, and the lesson learnt often goes into the final design. I think you're on the right track.
 

Latest posts

Top