Gardening

Prospecting Australia

Help Support Prospecting Australia:

This site may earn a commission from merchant affiliate links, including eBay, Amazon, and others.
One note here, Xypex is not good for pools as it doesnt allow a good bond of concrete to the reo, but there may be newer products that work.

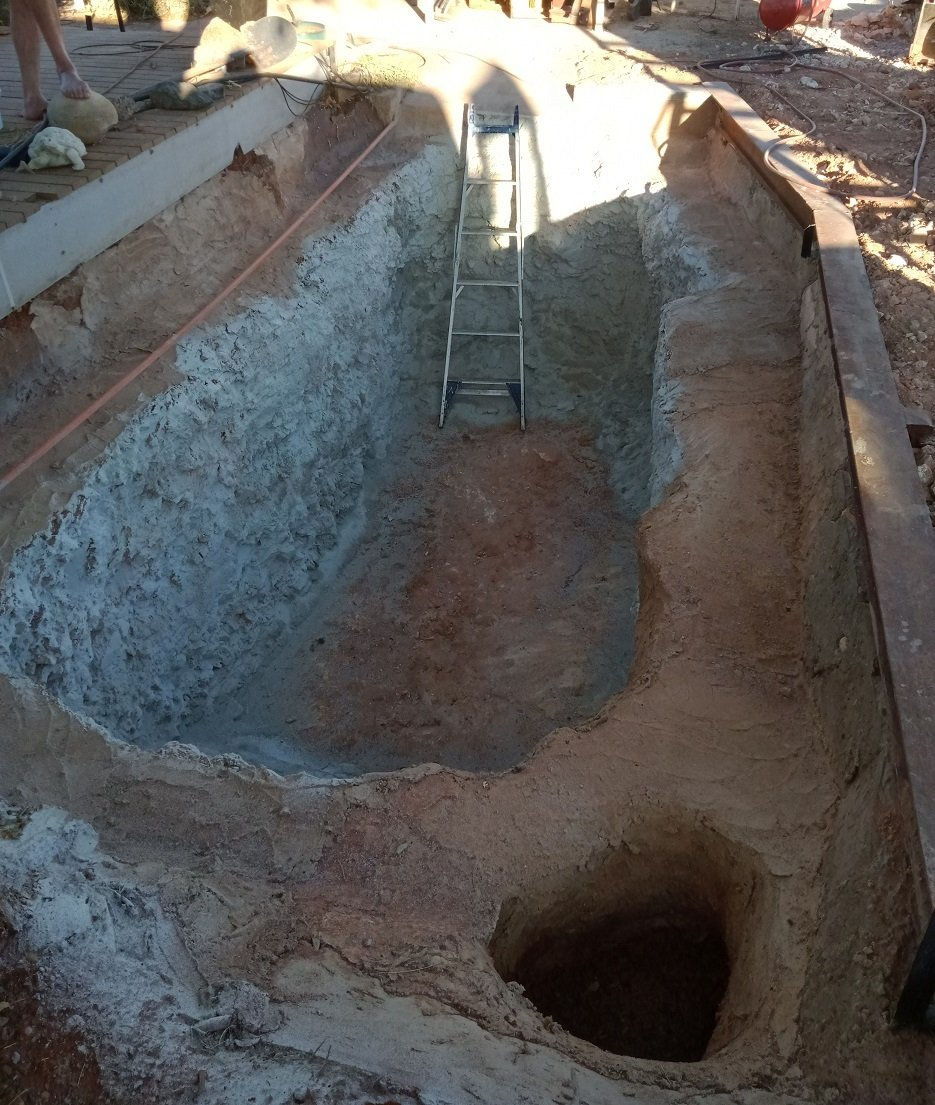
Is that a tree next to the hole ? Have in mind that the tree will find any weakness in your build to get to the water.

Moneybox, with pools, they drive a 500mm pin of reo directly into the vertical soil wall to wire tie the reo onto and hold it in place, and on horizontal planes they use 'plastic chairs or concrete resting blocks' that the reo sits in a groove or on a flat.

The reo panels are quite substantial at 8mm or 10mm x 100x100 mesh, this is in two layers and supported between them with tied in short bars (a little like wall ties in house walls)
the corners are bent reo rod tied to the mesh, thats for vertical and horizontal corners.

Once the mesh is all tied in the vertical sides can be supported by horizontal bars/beams across the hole from one side to the other, wire the top edge of the side mesh to the cross bars.
The support pins can then be disconnected and hammered into the soil wall, or you can do that as you lay up the concrete.
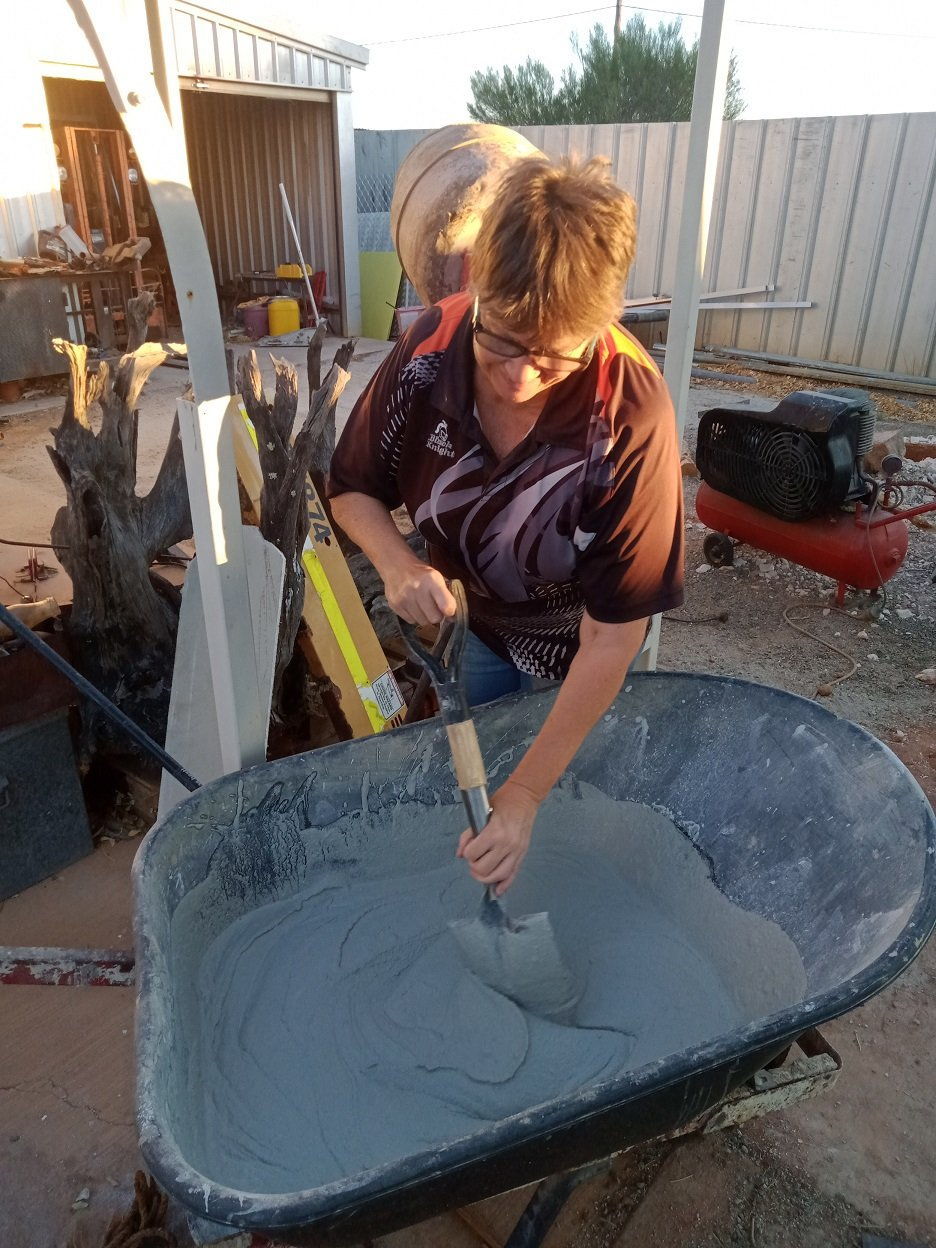
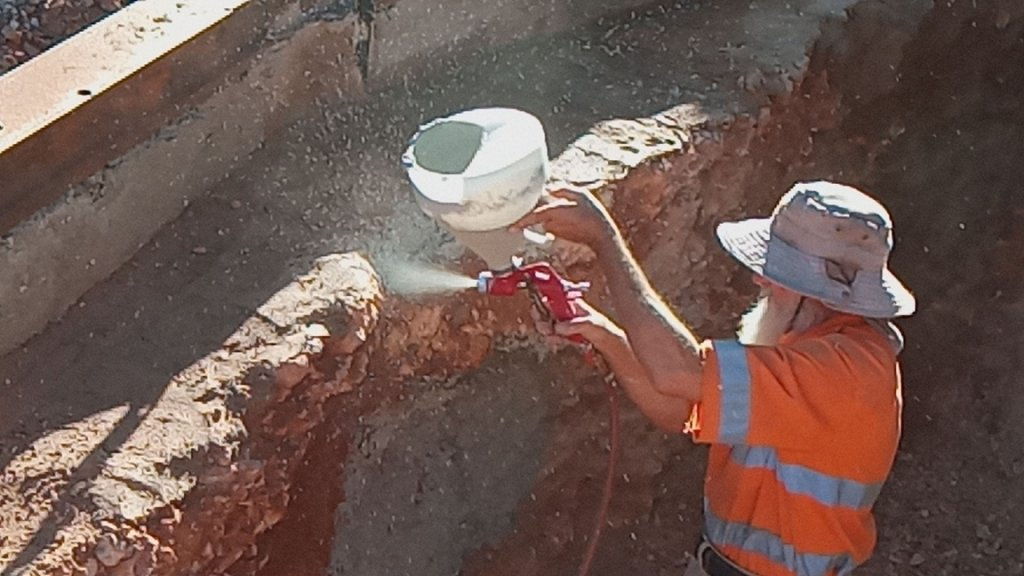
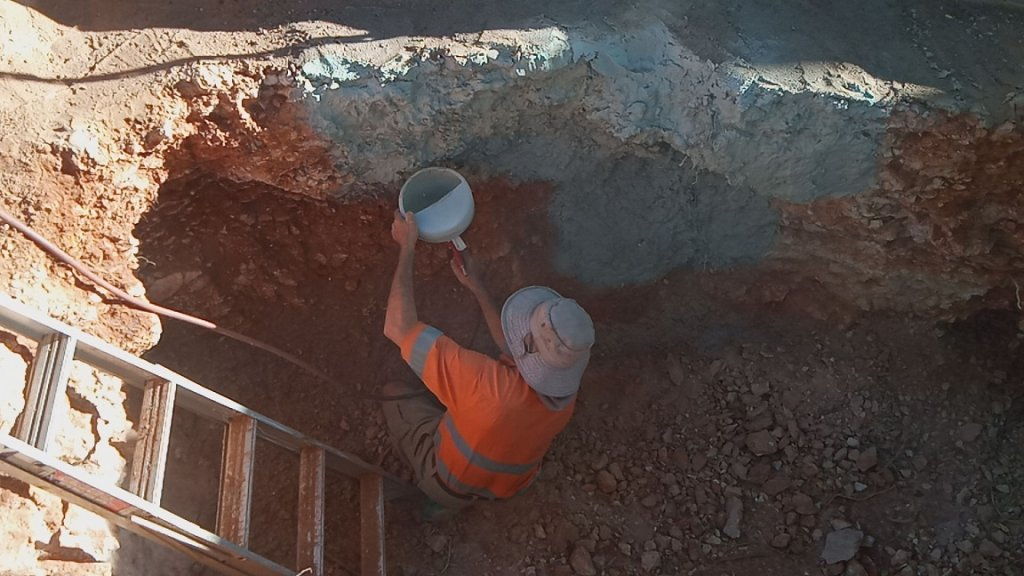
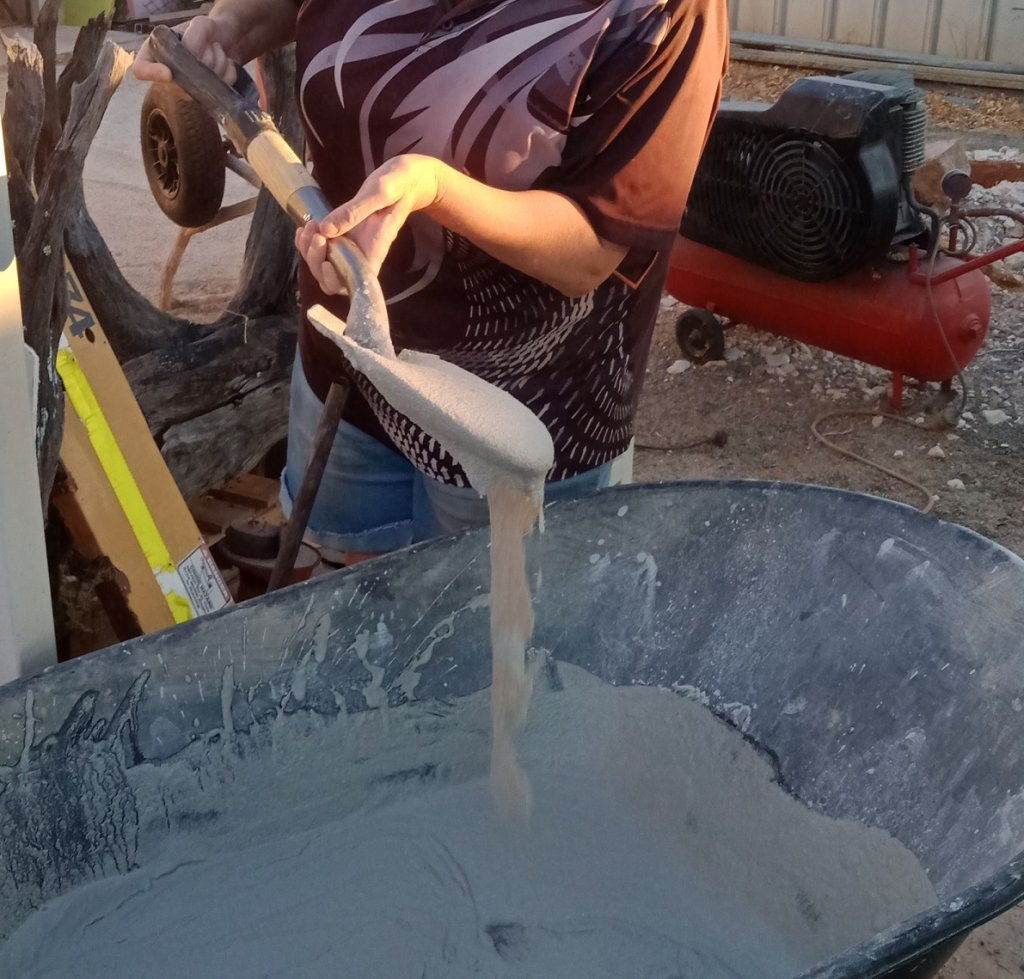
Concrete is a fine washed gravel, from memory 4-5 mm so it can be sprayed ? Remember a 50mm coverage of the reo is important, It isnt a cheap method to use.

I have used pond sealing product on the exterior of the Cellar, some are toxic, get one made for specific for fish ponds, they are great, use a bunch of cheap rollers to apply it.

Ground water and pool buoyancy cause most of the cracking problems, pools will float, but if the soil expands and shrinks seasonally with wet and dry weather, the concrete has to hold all the water pressure.

That is why I suggested a flexible membrane, like the heavy duty tarp or rubber materials. Price may even be cheaper. You can line the dirt side with cheap 5mm mdf to stop stones causing issues,
or sheet corflute.

https://www.youtube.com/watch?v=Clkv9gJJPw4

https://www.youtube.com/watch?v=IOWFtsKEJkg

https://www.youtube.com/watch?v=R2MYUSAwmVo
.
.

A couple of alternative build methods -

Mesh and pour the base, sit first layer of concrete blocks on the wet base to bond, let it dry, then drill holes thru the cavity of the blocks and into the 150mm base, install vertical reo, brick up with blocks and reo inside full height then fill cavities of blocks with concrete.

If you had trenched only you can use the excavation to be formwork for holding the vertical concrete pour and hang mesh into the trench, then excavate the guts out and pour the floor after pinning the mesh in place.

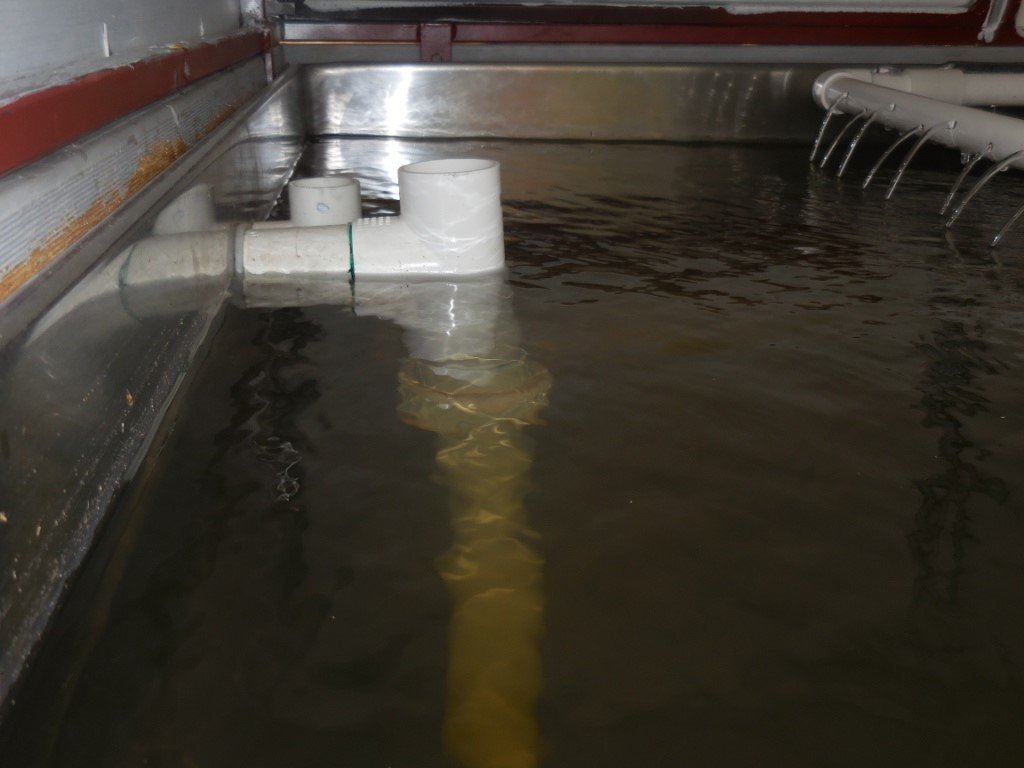
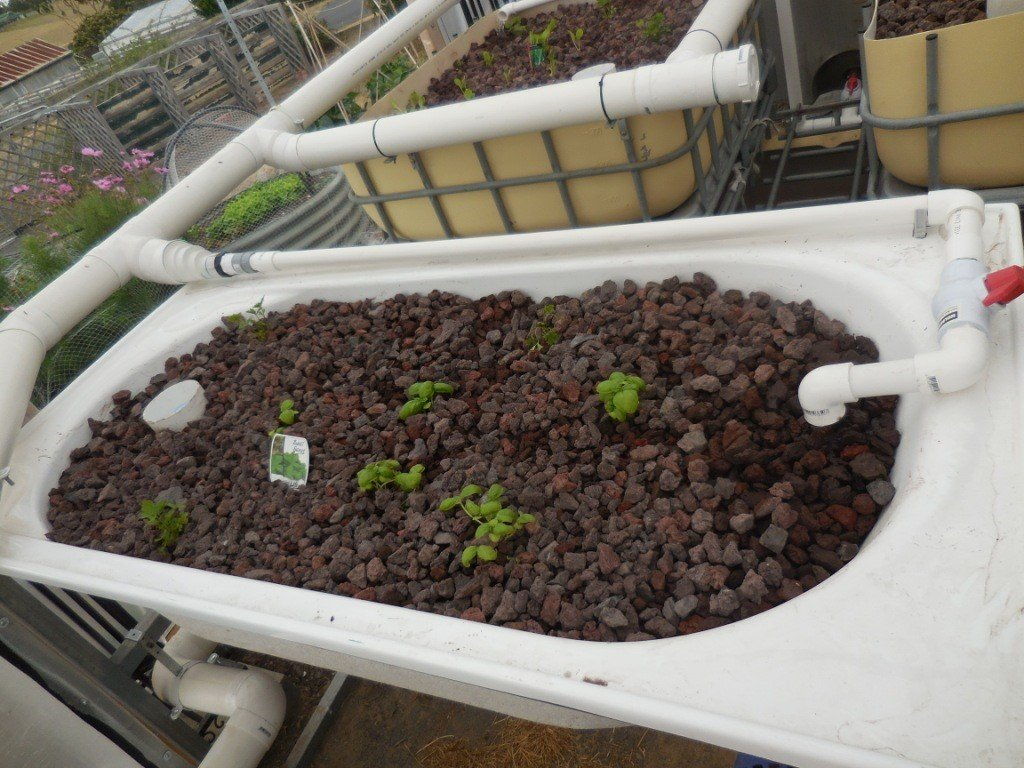
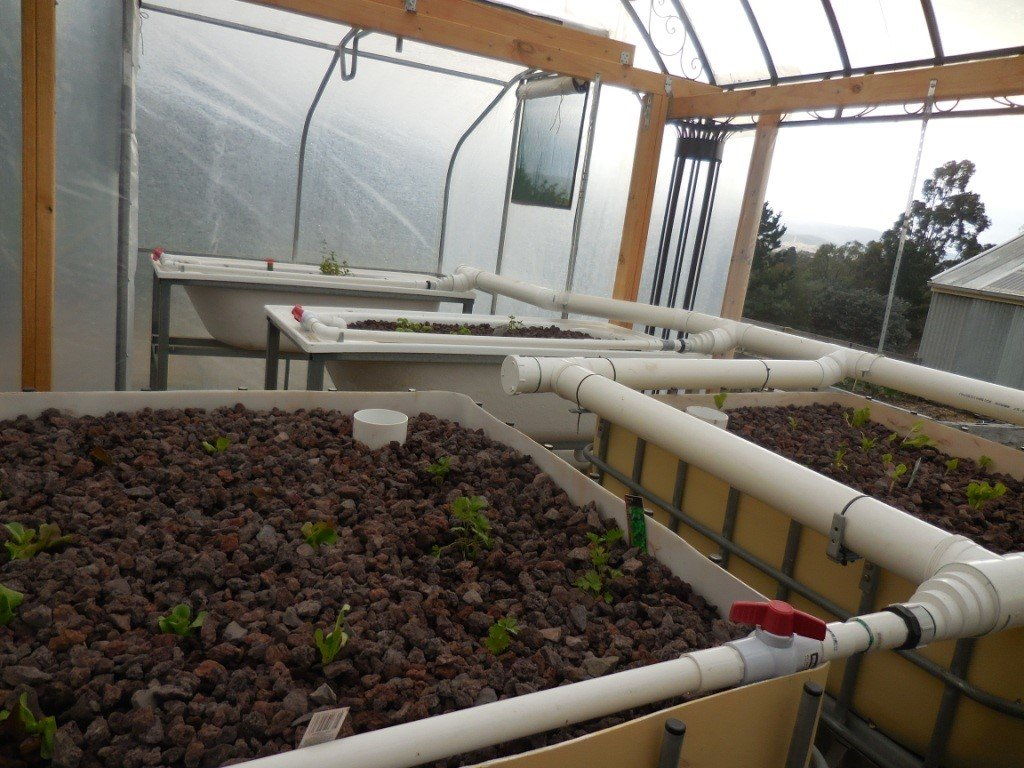
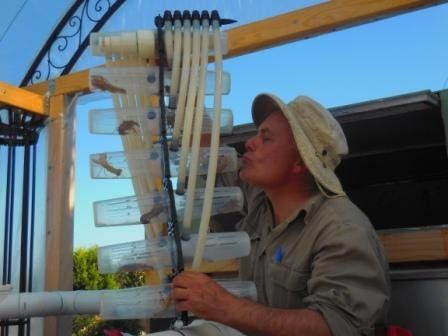
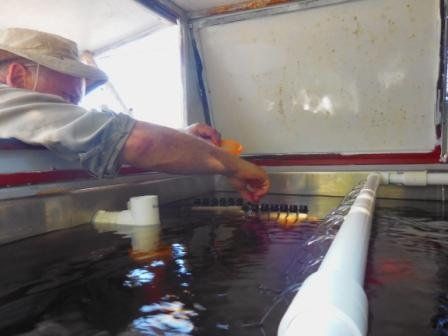
If it is a fish pond, have you thought about aeration of the water volume, a single dead fish can cause enough degradation of the water to consume all the oxygen and kill the others, please look into that.

Research by the Adelaide University has shown that a single dead Carp can deplete almost all of the
oxygen from 800L of water within 48 hours, further research carried out by WaterNSW at Prospect
Reservoir in NSW has shown a severe drop in dissolved oxygen. In most cases dropping to zero oxygen for
up to 5 days. WaterNSW researcher Joe Pera has stated again on the Landline episode that for such a long
period of low oxygen you will pretty much wipe out the rest of the ecosystem and that other species
would not be able to survive a depletion of oxygen for a day.


https://www.aph.gov.au/~/media/Comm...e/34 Letter from Aussie Carp Fishos.pdf?la=en

I you can source a product, I would highly recommend a flexible membrane.
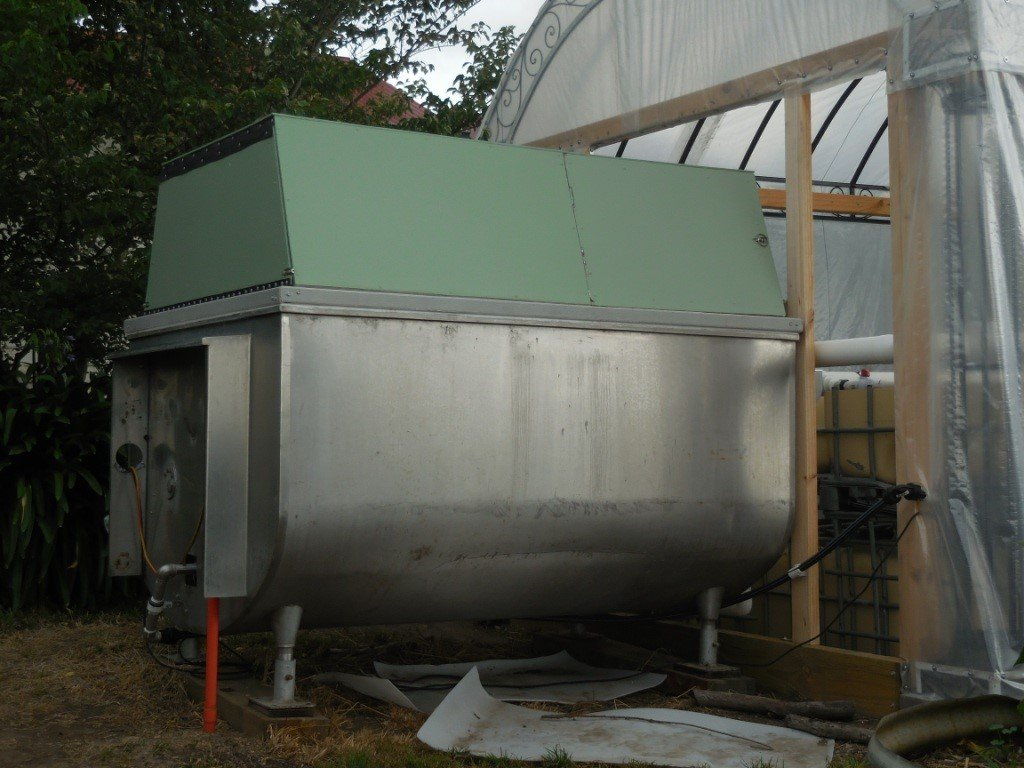
or a precast concrete or fibreglass product for the pond.

Best of luck mate.

:)

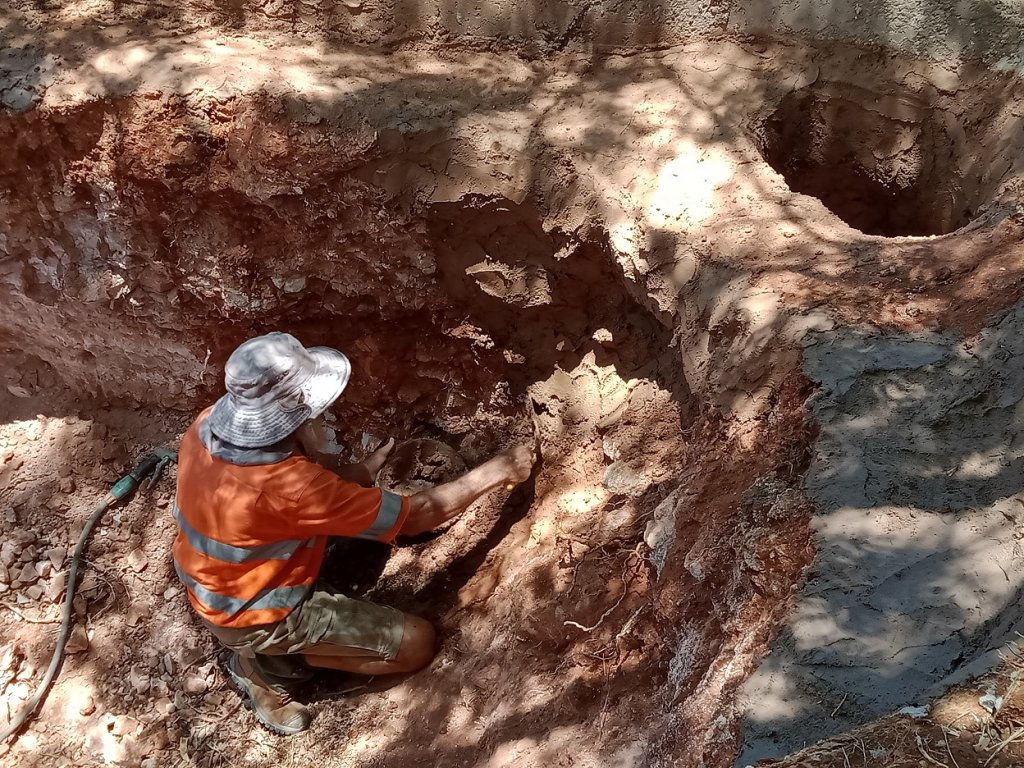
Make sure it is fenced to keep kids away, that is deep.
 
One common way of doing it in the outback for Aquaponics guys is sinking IBC/Totes into the ground. They generally hold 1000 to 1200 Litres each depending on what size you can get hold of. The beauty of this is that you can join them all by PVC pipe so that the level remains the same in each of them. So, for instance you could sink 8 into the ground of what ever configuration suits you, depending on available space and garden shape. The upside is that now you also have numerous tanks for grading/sizing.

You simply place the whole thing, cage and all into the ground and backfill around. 8000 Litres is great as far as stocking density and helping Temperature stability goes, but it does also have its own problems. You now need to move 8000 Litres in 1 to 1 1/2 hours (or possibly quicker with such prolific feeders), which means a much bigger pump (and filter if you aren't using grow beds for bio-filtration). Laguna pumps are the way to go (I ran one continuously for 3 years without a problem), they are made in Italy, brushless with Ceramic bushes and can handle food and other solids that will inevitably go through them. Don't overlook the filtration and aeration of the water, as things will look just fine and then you'll wake up one morning to a mass fish kill. It's a silent killer that goes un-noticed as it damages the fishes gills, and the death sometimes can be days after the actual event (e.g., power failure). I ran an automatic switch-over backup aeration system for power failure, that ran on a battery for up to 10 hours when the power went out (and it always does eventually), and then I had a generator as back up if that failed. The power-out aeration back up buys you more time when the pump fails, as increasing the oxygen then helps the fish cope with ammonia build up a little better. Salt (usually at 3ppm) is also recommended with freshwater fish to help combat Ammonia stress and disease, you may find it needs to be higher than this concentration though for Barramundi as they live in both environments, Fresh/Brackish and Salt water. This is only a problem if you want to grow plants as well, as more than 3ppm salt will be too much for them.

Just one other thing :) As much as it's tempting to grow a "big" fish, please don't go there. It's the downfall of most hobby aquaculturists. The idea is to grow the fish (any fish) to plate size and then get it out of the tank and eat it. This works well actually, as you don't want to sit down and eat 50 fish all at once or within a couple of weeks, as no matter how nice they are you'll be sick of fish in no time. They will naturally grow at different rates. Once they are bigger than plate size (and especially with predator type fish like Barra) they'll need a heap more food, use a lot more oxygen, secrete dangerous levels of Ammonia, and will attack other fish more readily.

D.S.

Good luck with it though mate, it can be very rewarding, and the only hobby where you get to eat your pets :D
 
Some interesting information Deepseeker
We have a disused 5 x 10 meter fish pond on one of our farm lots in the Philippines ..the digger wants to restock the pond with talapia. But we both lack any knowledge or experience in aquaponics so The idea is just an idea at the moment..
 
If you can do Talapia in the Philippines then go for it! Talapia are the best fish to have, but unfortunately here in Oz they are now illegal. They are easy to keep, will eat all the veggie scraps from the home and the grow beds, and readily breed in the tank. We could feed so many people and provide heaps of vegetables by using Talapia if we were allowed to, and indeed in some villages in Africa and India that's exactly what they do, and in an ever growing hungry world it makes sense. The main concern here in Australia is that they will end up in waterways like Carp, and out-compete our native fish.

Here are some pics of my Aquaponics system just after I first got it up and running.
The system consisted of a second hand 1500 ltr stainless steel Dairy Vat as the main fish tank shown in photo 1.

The cover was made from a secondhand hunting dog cage that goes on the back of a ute. I bought this too from ebay. It was the wrong size and configuration for my use, so I reduced it's length and increased its width, and put in an extra door so I could access my fish tank from inside the hot house, the back end in the garden, and from the two sides at the front. I then covered it with marine ply and painted it.

The next photo 2 shows the back of the unit with the tank inlet and power conduit, which eventually had a lockable cover on it and it housed all the electrics and back up gear. I had a 240v / 12v back-up air pump that automatically switched to a charged battery whenever the power went down. It kept everything alive without power for up to 10 hours.

The square cut out on the back shows the result of my first problem. At testing stage it developed a shocking leak on the inlet, and the only fix in the end was to cut a hole in the outer jacket with the 4" grinder so I could access the back of the inner tank and do a better job on the gasket and bulkhead fitting to stop it leaking. The outer jacket has a gap of about 50mm between it and the inner tank, which is filled with fiberglass insulation.

Photo 3 Shows the inside of the tank from the open front flap on the hot house side, showing the inlet/ aeration piping extending from the back where the photo is taken from. The PVC pipe runs up from the bottom of the tank and fully circulates the 1500 litres in the tank itself in around 48 minutes using a submersible pump that is located in a buried IBC sump tank around the front in the hot house. Everything MUST be either PVC, food grade Silicone (like the EDU Feeder lines shown) or food grade stainless steel. Copper or brass will poison your fish, and most other plastics risk leaching harmful chemicals into the system and into the food chain, and into the bodies of the people who eat the fish.

Pic 4 shows my PVC top outlets/ Overflows that go out through the tank walls. The tank itself is made from 316 Food grade Stainless steel. By doing it this way the tank is impossible to overflow.

Pic 5 shows the Hot House view from the house side, you can best see the location of the 4 growbeds together through the plastic in this pic. Two of the growbeds I made from cut down IBC tanks which are now in front of the Fishtank, and there are two Fiberglass bathtubs at the back.

The lean-too part of the hot house is an adloheat hothouse which I also bought on ebay. I needed a door for the front as well as something to make room for my 4th grow bed bath tub. The stands for the bathtubs I made myself.

Pic 6 shows one of the bath tubs, and behind it you can see the two cut down IBC's, sitting on top of another buried IBC which holds another 1000 Ltrs. The hole in the ground for it was terrible to dig, having to break through rock, hard clay and a quartz reef!, giving me 2500 Ltrs of water in the system in total, which helped protect the fish from temperature swings.

Pic 7 is the top of the buried IBC sump. I had to make something to stop the kids from falling in, so took part of one of the leftover IBC cages and reinforced the resistance welds that they come with with an arc welder, and made it so it's lockable to stop little people getting big ideas. One end has hooks that locate over the edge of the buried IBC sump cage, that also allow the cover to double as a ladder that hooks onto the side of the cages that the grow beds are sitting on. This allowed me to go down into the sump vertically without breaking my neck when I needed to. Without this it's a rather narrow gap that is hard to get into easily. The piping from the Submersible Pump to the Fish tank is 25mm Blue Line Poly . The pump itself only uses about 65 watts, the same as a light bulb.

Pic 8 shows the Hot House frame. I made this from a secondhand gazebo that I bought off of ebay.

Pic 9 is taken across from the Fish tank corner into the hot house which shows all 4 beds with their piping, which brings the water with the fish waste in it from the fish tank. The Grow beds themselves also had Composting worms living in them, which feed on the Fish poo and any uneaten food that makes it into the system outside of the tanks, and they turn it into worm casings and worm tea that the plants love and thrive on. You must use compost worms though, not garden worms. They are a different species that can survive in the flooding grow beds between cycles. Some, end up getting sucked into the bell syphon and make their way to the sump or the main fish tank, where a bunch of Highly appreciative fish are waiting with gratitude :) The worms just keep breeding and building up their numbers though and somehow manage (probably through eggs) to distribute themselves throughout the system.

Pic 10 shows me kissing one of my loving Yabbies through an EDU container. They are aggressive little buggers, and they all put their nippers up to nip you as soon as they see you. These 12 were to start the system off as it built up it's Nitrosomonas and Nitrospira bacteria which converted ammonia in the fish waste into ammonium nitrate to feed the plants. I had only just put in some seedlings at this stage to kick start everything off. I added another couple of dozen yabbies on EDU posts and then I stocked the system with about 30 odd Silver Perch, Plus Tandanus Catfish (which not only taste great but also help keep the tank clean) and Murray Cod.

The last pic is me feeding the little swines their pellets through the feeder manifold. I finally ended up, just prior to dismantling the system with 3 sets of 12 and a 6 unit batch which provided us with 42 yabbies to eat.

Eventually we were eating Cucumbers, Beans, Corn, and Tomatoes from the system along with the fish.

D.S.

1576661632_thumbnail_dairyvatfishtank.jpg

1576661654_thumbnail_tankinletandpowerconduitatback.jpg

1576661674_thumbnail_insidetankthroughfrontcover.jpg

1576661695_thumbnail_outletoverflowstakenthroughfrontsideflap.jpg

1576661713_thumbnail_greenhouseviewfromhouseside.jpg

1576661733_thumbnail_bathtubgrowbed.jpg

1576661752_thumbnail_topofsumpshowingremovablecoveraccessladder.jpg

1576661775_thumbnail_greenhouseroofinside.jpg

1576661803_thumbnail_layoutof4growbeds.jpg

1576661864_thumbnail_yabby_love.jpg

1576661883_thumbnail_feeding_time_-_copy.jpg

1576663832_photo039.jpg


That last photo was Yannis The Yabbie. He lived in the Sump tank for a while and was god knows how old originally. My youngest took a shine to him, so I gave him the name because he looked like a big hairy Greek guy who had been working out. You only had to look in the sump tank and his big claws went up in a "I'll take your bloody finger off!" stance. Eventually he died from what I think was Yabby old age.
 
When Yabbies (Cherax Destructor) like that die, it is usually from being 'Claw Bound', they get such large muscles inside the claw
that they cant pull them out thru the joints when shedding the shell to grow into the next size.

So they literally die from being too full of meat.

Other types like Red Claw and Marron, Murray Cray do not have this problem - just guys like "Yannis" there.
Surprisingly 'plate size' is about the length of the pen, maximum meat volume for grow out time and minimum feed.

Did a course with SA Fisheries dedicated to yabby farming.

Had a crush on these guys since discovering them as a kid in the local creek.

:inlove:

Quite a set up DS, great write up too. :perfect:
 
Moneybox said:
Sounds like good advice but my biggest problem is that it's difficult to get nice neat sides to pin the mesh to. The cap rock is solid and wide spread. Everywhere I dig here I hit the same sheet of rock 200-250mm from the surface. When I dug the six holes for the shade sail it was just the same although it didn't seem so loose underneath. We don't get a lot of ground water here so I'm not expecting trouble for that direction.

The liquid rubber is meant to form a membrane not unlike laying a plastic liner inside only it will be firmly bonded into place. I'm counting on the fibrous concrete taking the water pressure a bit like a fero cement yacht and the rubber taking care of any minor porosity.

I know I have a lot to learn hopefully it wont be an expensive lesson :)

I'm not sure what you mean, by needing neat sides, you hammer a 500 length of reo horizontally into the wall, soil, dirt, stone doesnt matter, like a nail into a wall,
but leave about 100mm/4" sticking out. Do this about every 1000mm along the wall - top middle and bottom - it just holds the mesh flat in a vertical sheet along the wall.
You need about 50mm of concrete between the wall and sheet for concrete coverage, and 50mm of concrete coverage infront of the mesh.
The wall doesnt have to be a clean smooth face, the cement will fill the lows and highs along the wall, just think averages when calculating the volumes for cement
and add 10% extra for safety.

I was 1 bucket short of enough cement to finish a small slab for a pizza oven :argh: , I left the hole in the middle of the slab to finish it later with a small patch, all good ;)
My problem was 5% extra, not the usual 10%. :lol:

Settlers used to build wells out of local stone and what came out of the holes they dug, place stones around the sides and cement those together, the irregular shaped
rocks would work like reo once bonded together, I have seen some massive tanks in the ground done this way, over 150yrs old, the bottom of the well was a clay layer or concreted.

;)
 
Wow Deepseeker that is an awesome set up you have mate Thanks for sharing.
I have been watching youtube videos all day about fish ponds and aquaculture starting with the link hippyprospector posted.
Its really fascinating stuff
I am keen to do something with the small pond we have and the
obvious choice is to raise Tilapia .. :perfect:
 
Yannis did manage one moult in the time that we had him, claws and all. I remember at the time it looked for all the world like another Yabby had found its way in the system. It was the same with those that moulted in the EDU's, if you caught them before they ate the moult you'd swear that there were now two yabbies in the EDU. As you probably know it's the most vulnerable time for them in the wild while they are waiting for their new shell to harden, and of course they need to eat it for the calcium to help the new shell.
 
All up Yabbies are an interesting pet.

In the right conditions they can go from hatchlings to table in as few as 3 months.

Herbivores and omnivores, most people thing you feed them meat, but they will track that because of its high protein and smell
not because its the natural food source.

I wanted to farm them but you need acreage I could not afford at the time.

:/
 
Thanks for all the good advice Deepseeker, Greenhornet_au and others. I do appreciate it and that's my main reason for this thread however please don't be offended if I don't follow much of this advice. I've never, throughout my working like, been very good at following in the steps of others. However I do like to seek out the views and ideas of others and then pick the bits of advice I like and store the rest for future reference.

I've been following "Rob Bob's Aquaponics & Backyard Farm" youtube videos. I believe he gives a lot of good advice and of course much of it matches the advice you've given me. I had already decided to make up a venturi system to aerate the water but then I found out that it's common practice and I can even buy a ready made venturi designed for the job. The other thing I picked up was the need for an automatic backup air supply. I'll have this supported by solar powered batteries. I already have 15 used solar panels just waiting for a job.

The main reason that I've gone for a big deep in-ground tank is for temperature control. I have no intention of filling it to capacity with fish. We need to be able to grow sufficient vegetables for our own use and a bit to give away. The fish are just to supply nutrients to the vegetable garden. I'm hoping the large water capacity will be less reliant on regular maintenance because we go missing for months at a time and I can't rely on others to keep things running here.

Time will tell if we're successful but we won't know until we give it a go :)

Deepseeker, I'm hoping my system doesn't develop into a complex system like yours where it ends up a job. I don't need another full time activity, just a hobby.
 
Greenhornet_au said:
Settlers used to build wells out of local stone and what came out of the holes they dug, place stones around the sides and cement those together, the irregular shaped
rocks would work like reo once bonded together, I have seen some massive tanks in the ground done this way, over 150yrs old, the bottom of the well was a clay layer or concreted.

Just as a matter of interest. My mother's second cousin was Russel Hintz. My great, great grandparents, the Hintz family lived on a property where the Hintz Dam is situated on the Gold Coast. Before the old house site (the house was mover to the pioneer village) went under water we, the family, visited it. Out the back was a very deep well about 6' in diameter that was formed in solid granite. Old man Hintz dug the entire thing using fire and water. He used the fire to heat the rock and then would douse it with water to explode the rock.

Mum told us about it when my brother an I came home from a camping trip to Red Rock Gorge near Stanthorpe where we lit our campfire on top of a slab of granite and then got showered with hot coals from the delaminating granite :8
 
Greenhornet_au said:
I'm not sure what you mean, by needing neat sides, you hammer a 500 length of reo horizontally into the wall, soil, dirt, stone doesnt matter, like a nail into a wall

Coming back to what I said earlier about not being good at following advice. My aim with the spray concrete and then a spread of render is just to get a stable surface to seal with liquid rubber. I have no intention of building a solid reinforced concrete structure. I want a rubber lined tank and I can't achieve that until a stabilize the loose soil.

I might fail and then come back to the fully reinforced and solidly constructed tank but I won't know until I give it a go. However if I fail I'm more likely to have a plastic liner made to fit the already constructed tank.
 
Google is my friend, so I asked Google how to mix render to line the walls of my fish pond. The answer came back with the recommended mix, sand, lime and cement. Then I asked my friend "Can I use crusher dust in my mix?"

1577801994_crusher_dust.jpg


I have a little pile of crusher dust out the back. Google told me that a bit of clay in the mix makes it stick. About 10% is good. Then my friend suggested a test to see how much clay is in my crusher dust.

1577802228_sand_bottle.jpg


3/4 fill a clear bottle with the crusher dust, fill with water and shake. Then just let it settle and the percentage of clay shows clearly above the sand. Mine is close enough to 10% to do me.
A thought sprung into my head when I was doing this :playful: If there was any gold in my bottle when I shake my sample and allow it to settle it would show clearly at the bottom :) No, there was no gold this time :|

1577802730_dusty_mixer.jpg


The mix was a bit dusty but it certainly mixed up nicely.

1577802808_tip_mixer.jpg


So then I tipped it out, well I tried to..... :eek:

1577802884_get_render_out.jpg


It's really nice to have a sticky mix but how do you get it out of the mixer?

1577802976_render_sides.jpg


I thought I was going to have trouble but I couldn't believe how this stuff defies gravity. A trowel full flung at the wall lands like a cow poop and sticks like you'd expect something like this to stick to a blanket ;) on vertical surfaces and overhead.

1577803242_mix_render.jpg


It was slow going and difficult on the really loose dirt that continued to fall as soon as it was touched so while I was spreading this lot Mrs M mixed some for the spray gun.

1577803644_spray_render.jpg


Now that's the way to get a coating on in a hurry. Even on the very loose dirt it stuck and set like a rock to form a solid skin.

1577803955_spray_render2.jpg


Like any kid, while she was waiting, she had to play with it like it a plate of porridge :D

1577803578_mix_render2.jpg


This coat is only to stabilize the soil. I still have to give it a coat with the trowel to cover a lot of the lumps and bumps.

1577804487_rendered_hole.jpg


So far so good, it seems to be going to plan..... :cool:
 

Latest posts

Top