SPP conductivity switch - pre-made crimp leads

Prospecting Australia

Help Support Prospecting Australia:

This site may earn a commission from merchant affiliate links, including eBay, Amazon, and others.

Goldpick

Chris Johnson
Joined
Nov 7, 2013
Messages
8,636
Reaction score
12,616
Location
Mount Gambier
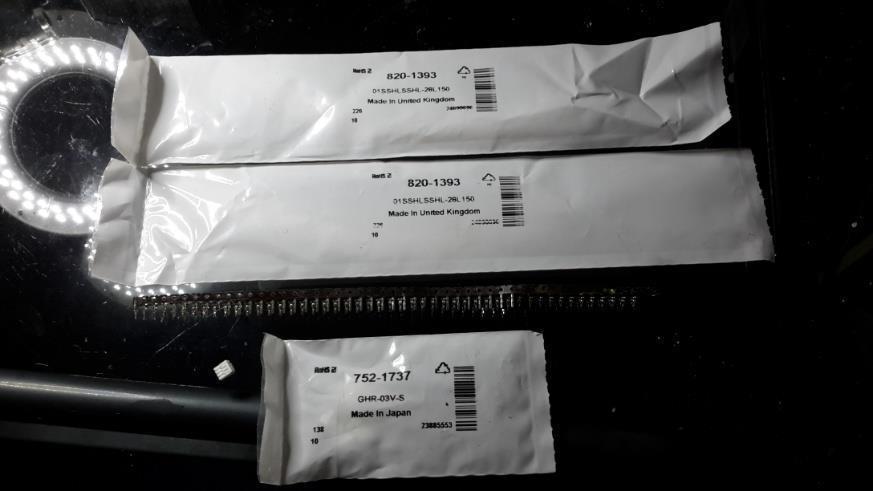
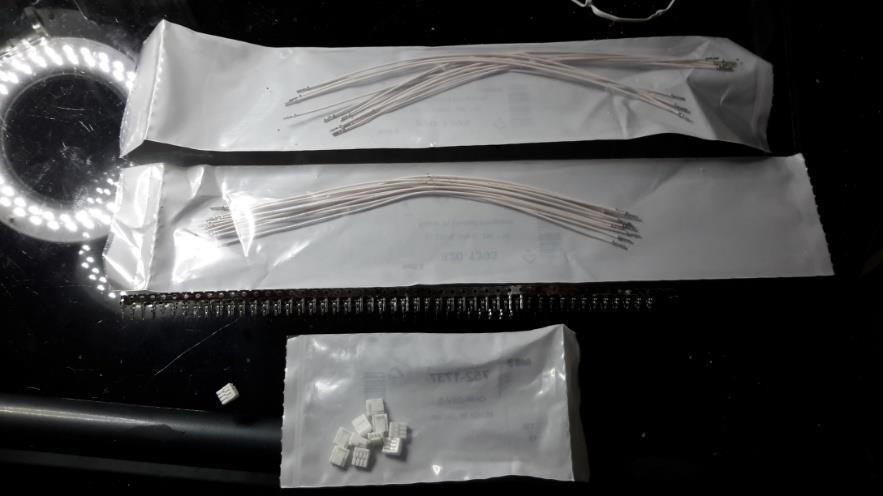
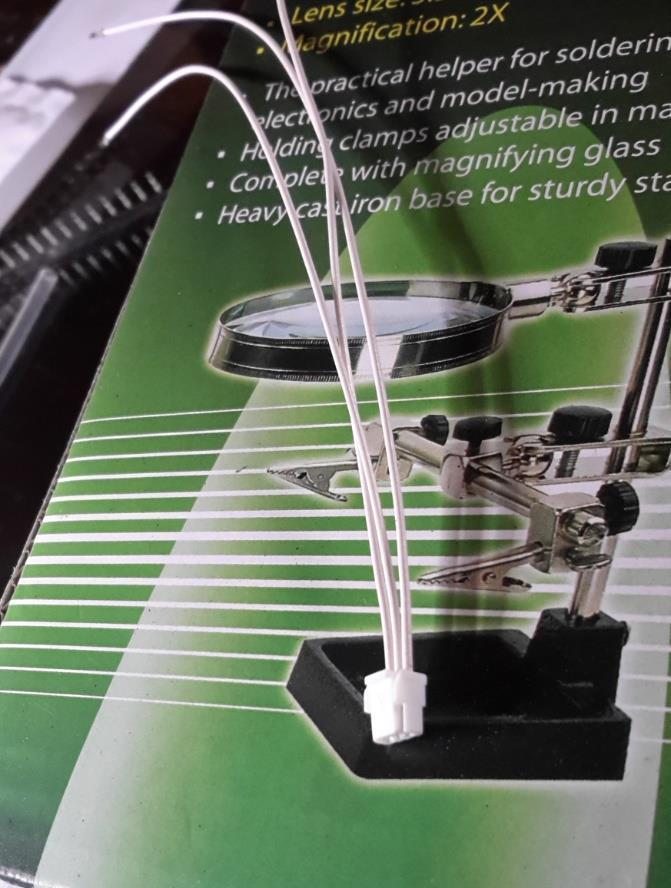
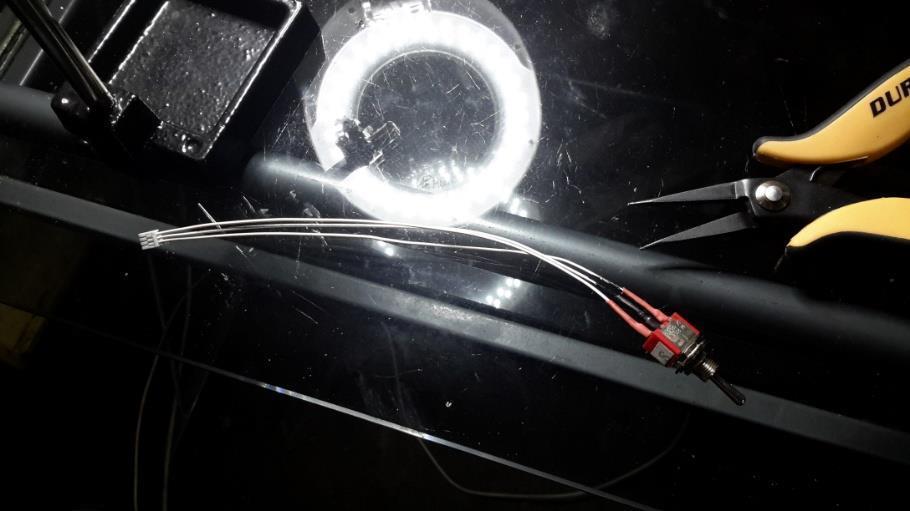
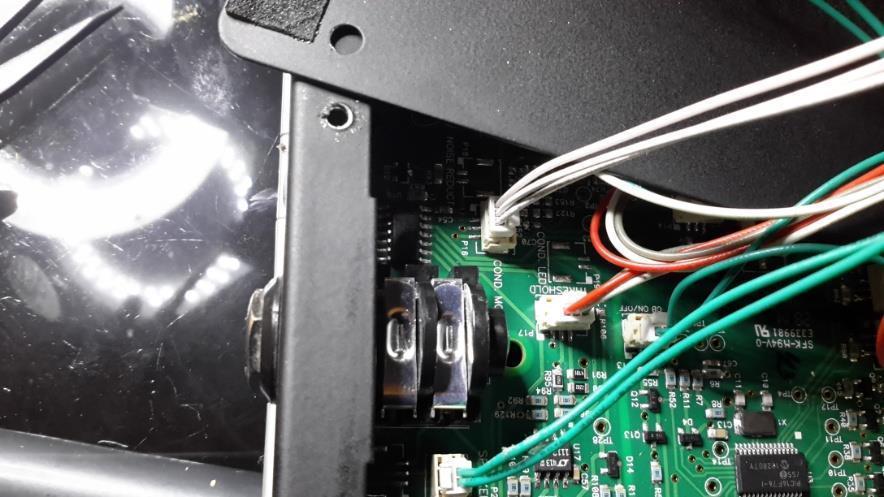
As per the previous topic, I had a go at making up the crimps and plugs to suit the hi/all/low conductivity switch on the SPP, though failed miserably using some very small needle nosed pliers to try and get by. Though I have found a lot easier option of buying ready made leads to slot directly in the plug from RS online, much cheaper than sourcing a suitable crimper. Just need to cut off the crimps on the opposite end, solder and heat shrink to the switch, mount the switch, and connect the switch to the circuit board socket.

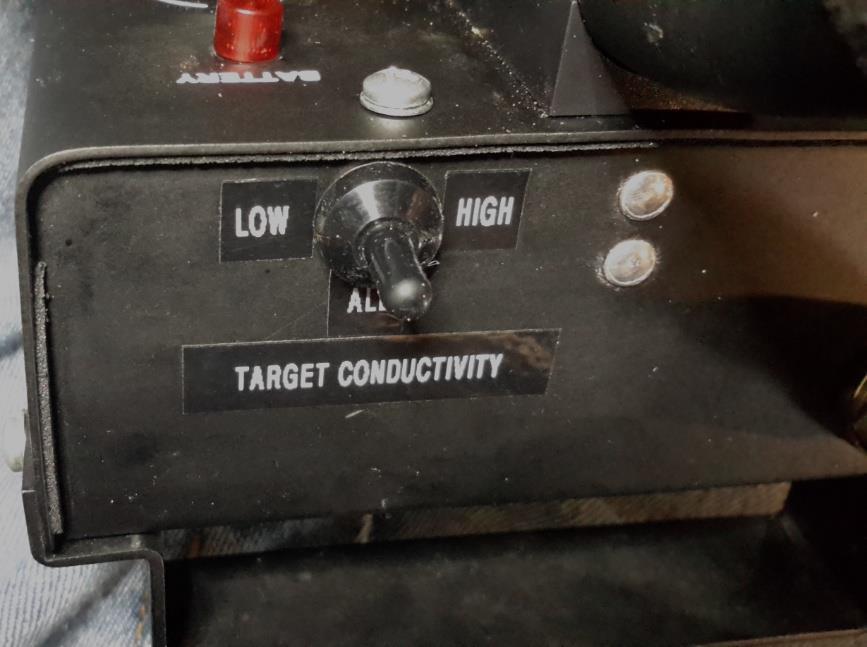
The current positioning of the switch is handy for me considering I am left handed, and doesn't foul on any internal components, though luckily the very short outer casing screw just cleared the switch. Made up a few labels with the P-Touch machine, and lastly fitted a rubber boot to protect the switch from dust ingress. :)

1442557968_img_20150918_124909.jpg


1442556654_img_20150918_124836.jpg


1442547562_img_20150918_131148.jpg


1442556686_img_20150918_151307.jpg


1442556713_img_20150918_151337.jpg


1442557314_img_20150918_155435.jpg
 
Bloody great idea Goldpick, i wish i new they where available before. Would of saved me a lot of swearing and cursing. :)
 
Thanks guys, the switch is a great addition for just a few dollars, may as well add it if the feature exists.

I can sympathise with you Roscoe, trying to crimp those things even under a magnifying glass was very frustrating to say the least. When you purchase the female connector from the RS site, the pre-made leads are shown just off to the right of the same page, along with the strips of crimp pins. :)
 
Looks like you done a very neat and tidy job, very pro like. I put my switch right where the whites sign is, but i do like where you have positioned your switch, looks good.
 
So the socket to plug the connectivity switch into is already in the detector & all you need to do is make the switch & plug it in, is this correct.
I thought some soldering had to be done on the circuit board or something inside the detector.
Hey Goldpick, how much would you charge to make a switch like yours & post it to Vic, I got no tools for doing stuff like this.
 
ozziii said:
So the socket to plug the connectivity switch into is already in the detector & all you need to do is make the switch & plug it in, is this correct.
I thought some soldering had to be done on the circuit board or something inside the detector.
Hey Goldpick, how much would you charge to make a switch like yours & post it to Vic, I got no tools for doing stuff like this.

No soldering (other than for the toggle switch), or drilling if you utilise the stock battery light position. A pack of ten 1.25mm pitch housings (the female plugs) cost about 30c, and a pack of 10 pre-crimped cables cost around 70c, toggle switch - $4. Will send you a PM ozziii. :)
 
Oh ok, pretty cheap to make then. Using the battery light hole might be a good idea as the detector is my brothers but I use it the most & he doesn't want to change anything because of warranty, but if no actual mods need to be done then he might just agree, specially if it will make it a better machine & help find gold better.

PM received & replied, thanks Goldpick.

Paul.
 

Latest posts

Top