Surf Pi 1.2, Surfkit

Prospecting Australia

Help Support Prospecting Australia:

This site may earn a commission from merchant affiliate links, including eBay, Amazon, and others.

Mrlimb

Michael
Joined
Jan 19, 2014
Messages
53
Reaction score
7
Location
Bundaberg, QLD
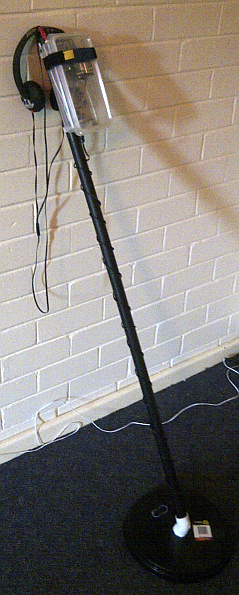
I have just ordered a Surf PI kit from the UK
http://www.silverdog.co.uk/shop/index.php?route=product/product&product_id=76

They are a simple but from what I have read affective PI detector. The unit seems to be simple enough to make but the coil will give me some curry, I have done hours of research and all I can determine is there are a lot of factors and best approach is to build on and see what happens.

It looks like I am looking for
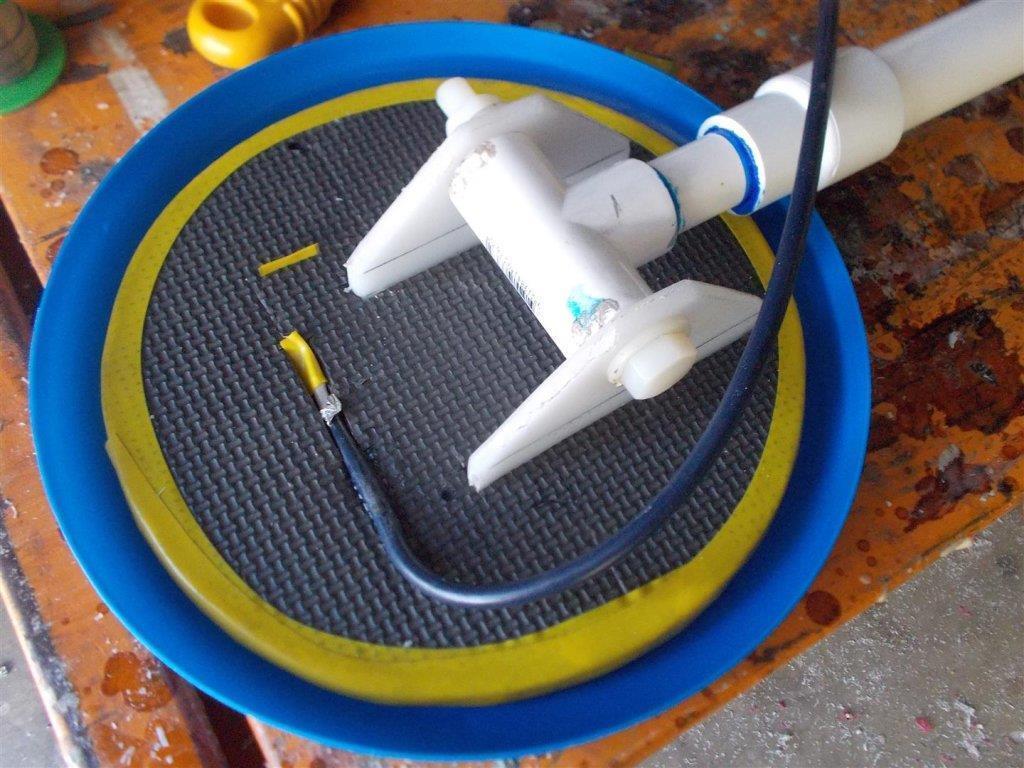
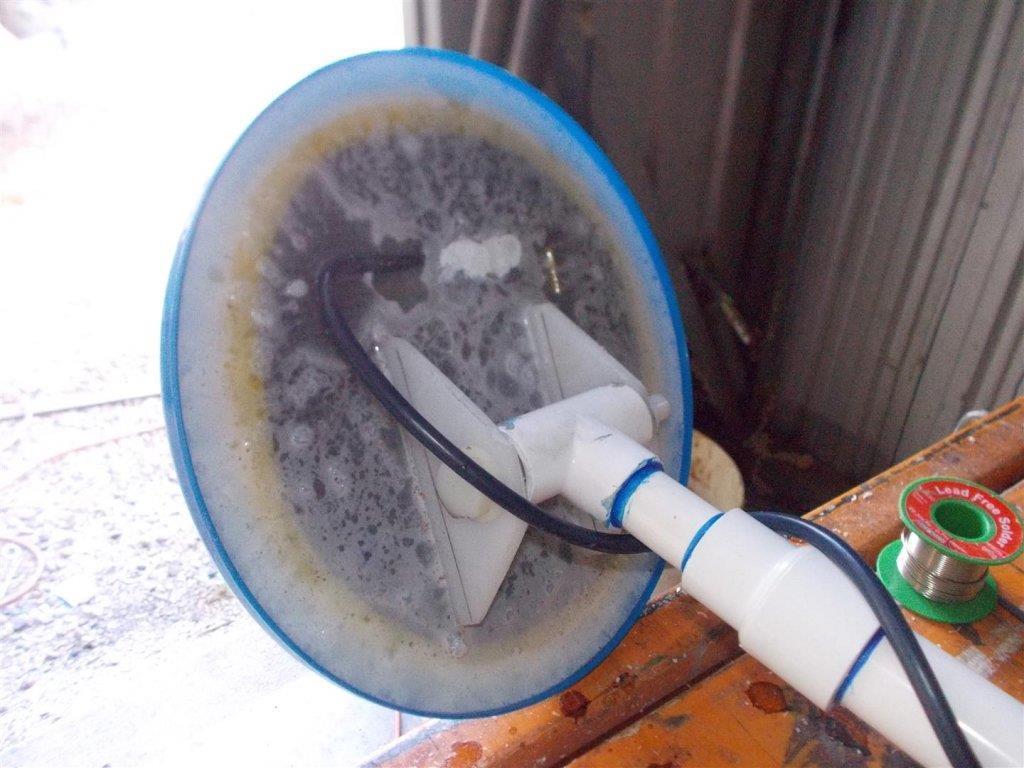
mono coil about 10" diameter
around 230-300uH resistance
minimum delay about 10-15
shielded twisted wire around 24awg

I know I could buy such a beast but that would defeat the purpose and satisfaction of making my own.

Has anyone else built this kit. Any advise greatly appreciated.
 
Hi Mrlimb,
I also am in the process of building a Surf P.I. 1.2 metal detector and have completed my coil using using the information I gathered off Geotech (coils) with a link to: How to build a high speed coil by B.B.Sailor I haven't tried it yet as I had a failure on my pcb, but there is a lot of good info on the site.
Cheers
Dave.m
 
Thanks Dave.m, I have had a look and that is where I have found most of my information. When the kit arrives does it have any paper work with it as in instruction or coil requirements?
 
I am keen on this as well.
Looks like quite a capable machine and there is nothing like that
feeling of "I built it myself" :) :)
 
No paper work or instructions. The screenprinting has component values. Commercial coils make it very easy to put together a detector but understand if you want to go fully homemade
 
I found this on
http://forum.kimbucktwo.com/index.php?topic=5020.50

enamel wire, tight wound coil , 23cm dia, 20turns, .5mm swg

How hard can it be????????????

Others have documented the process and that will make it easier, I will try to do the same.

I also found this to be very helpful to calculate different wire resistance.
http://chemandy.com/calculators/round-wire-resistance-calculator.htm

using "enamel wire, tight wound coil , 23cm dia, 20turns, .5mm swg" the wire resistance = 1.2340401ohms. Handy to use as a comparison/
 
Still waiting on kit but I would be surprised if I saw it this side of Easter. I have started to build a coil, well 3 attempts is more accurate.
Attempt 1
1397458023_dscn0160.jpg

This is some speaker wire wrapped in a flat spiral then put in a plant pot base. Still may work.

1397458124_dscn0161.jpg

Second plant pot base for the top.

Attempt 2
1397458187_making_template_1.jpg

Mark a circle on a timber, add cup holders and wrap wire around, Sounds easy and it is but the problem is shielding, I am looking for small gold so I need a low pulse rate They call it a Quick coil. As you can see in the photos I used foil. I have since read that is a bad idea. the decay of the foil magnetic field is slower than that of gold so if I tune out the foil I also tune out the Gold.

At least I am learning
1397458481_wrap_wire.jpg
1397458534_dscn0170.jpg


Next to house the coil
1397458588_dscn0162.jpg

1397458609_dscn0164.jpg
1397458625_dscn0166.jpg


Shielding still the problem, Will finish when I work it out

Attempt 3
Lets just say not good
I started with the same process as attempt 2 but only 8" as that is better for gold, Shielded it with Graphite powder on PVC glue. Ohms meter says I have a good grounding of the shield, the shield has a low resistance, things are looking good. I put everything in another flower pot base, fill the base with resin to seal everything. Now I have a bowl of resin with a floating coil wrapped on foam to keep the weight down. I then decide to coat the coil in fiberglass seeing there I have the resin made up. I should have just walked away. with all my playing the graphite shield began to wash off and I have resin everywhere. When it dries I will assess the damage but the idea will work with some tweaking so until the next coil I am just going to have a rum and reflect on the day.

I will try some photos later for attempt 3
 
As it turns out attempt 3 was not as bad as I thought. Not sure if shielding held. I guess I will find out when I hook it up.

attempt 4
I used a much smaller wire only .25 ( this should make for a quicker coil), followed the same possess as attempt 2 with the exception of putting double sided tape on the jig first and between each layer and on the last layer. I stripped a section of wire on the last turn. This wire is the only wire on the outside of the outside of the double sided tape. Next I added a good coating of graphite powder to the tape leaving a gap so as not to make a circle. Wrapped more tape over the graphite layer. Slid the coil off the former and put on some foam I had cut to the same size as the coil. When tested the connection with multi meter the coil negative and the graphite on the other side of the coil had high resistance but there is a good connection.

the next step is to glue the foam to the plastic base (frisby) before adding the resin for water proofing.
 
Yeah the Ozito drill was a piece of crap but at least it's battery pack could be salvaged. I mounted this on the end of the top shaft of the SurfPI detector where the arm band goes to act as a counter weight to the coil. It also serves double duty as a stand when you find a target. :p
 
gcause said:
Yeah the Ozito drill was a piece of crap but at least it's battery pack could be salvaged. I mounted this on the end of the top shaft of the SurfPI detector where the arm band goes to act as a counter weight to the coil. It also serves double duty as a stand when you find a target. :p

How long do you get out of a charge?

This is a photo of attempt 4, much happier with the outcome than the previous attempts. I think I will stop building coils until after I have given this one a good run.
1397631840_dscn0201.jpg


I have now filled with epoxy to water proof.

Next stage is the circuit board, should be here soon. :D
 
8" Coil finished and mounted.
1397698673_dscn0203.jpg


Question about weight of water proof coils, How does yours way in?
This one is 369 grams

1397698692_dscn0205.jpg

Heavier than expected but it will be used in streams and creeks a lot of the time so the water will help support it.
 
Nice coil build there.

You can also use purchased coils, I posted the pin outs on another thread here.

I never ran the detector long enough to drain the battery completely but the current draw is small so it should last at least a day.
 
Kit arrived 2 days ago, very simple to put together. Hooked up to the coil and it lives. With the 8" coil I m getting about 10" on a gold wedding band. I was hoping for better but that could and from what I have read more likely the coil than the circuit that needs improving.
 
I must have been asleep when I was getting 10". When the air test was redone I am getting about 4" on the ring, about 8" on Australian coins with the exception of 5 cent coin, it is about 5".

took the detector out for the 1st time in the field and found part of a car and 2 pieces of fencing wire.
 
Hi Guys,

I recently reproduced (copy) the SURF PI 1.2 KIT on a prototype PCB, based on the Original Schematic.

1400484424_taodetect.png


But the only way to let it working well, is to put a 10K Resistor (as a Pull-Down) between pin8 of U4 (4093) and the GND,
and I am not satisfied about that, because I really want to respect the original Schematic, for maybe getting better results.

So I have 2 questions:

1) What Voltage value have you on "TP2" when a piece of Metal is detected by the Coil ?
I set 0V as described on the Silverdog Website, and when I detect something, I've got: -0,32V

2) What Voltage have you on the PIN8 of U4 (4093) ?

Many thanks for your help !

Cheers

TAOZ
 
Taoz, Go to the GeoTech forums as the correct voltages are discussed there and there are mods needed to the original schematic to get optimum performance this are also discussed in detail there.
Best of luck with it :)
 

Latest posts

Top